dynamic number of nics in aria 8.11 blueprint
intro⌗
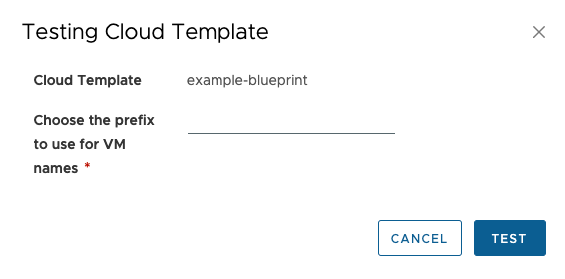
vRealize Automation / Aria Automation 8.x allows you to setup blueprints with input fields for the users. Those can be checkboxes, drop-downs, text fields etc - you can then use that data to customize the new deployment. For example, a textbox input field could allow the user to specify a prefix to use for naming the newly deployed virtual machines.
That works well and good in most cases however there are some exceptions - one of them is allowing the user to choose the number of NICs to add to the VM.
1: defining network resources⌗
Before we touch the code behind the VM configuration, we need to adjust how we define the network objects. Usually, you’d expect to see something like the below for a typical vSphere network:
Cloud_vSphere_Network_1:
    type: Cloud.vSphere.Network
    name: default_network
    properties:
      networkType: existing
Unfortunately, due to how we are going to define our input fields and configure the VM itself, we need to setup our networks differently:
Cloud_vSphere_Network_1:
    type: Cloud.vSphere.Network
    name: default_network
    properties:
      networkType: existing
      deviceIndex: 0
Cloud_vSphere_Network_2:
    type: Cloud.vSphere.Network
    name: extra_network_1
    properties:
      networkType: existing
      deviceIndex: 1
The main difference here is the addition of deviceIndex lines which will ensure the two networks will be assigned to the correct NICs.
2: user input⌗
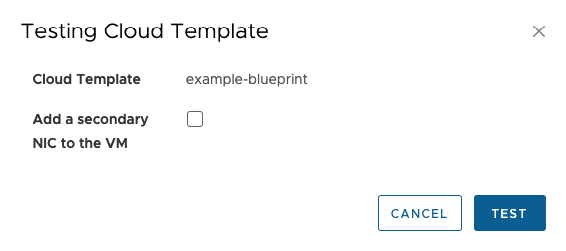
This is going to be pretty straight forward: all we need to do is to define a boolean input field for the users and ask them whether they’d like a single NIC or two. We can do that like so:
inputs:
  extraNic:
    type: boolean
    title: Add a secondary NIC to the VM
    default: false
3: dynamic network resources⌗
Now we need to ensure the second network resource (Cloud_vSphere_Network_2) is “optional” so to speak. To do that, we can add a single line to its definition in the blueprint like so:
Cloud_vSphere_Network_2:
    type: Cloud.vSphere.Network
    name: extra_network_1
    properties:
      networkType: existing
      count: '${input.extraNic == true ? 1 : 0}'
      deviceIndex: 1
What’s gonna happen here is vRA is going to ignore the resource if the count is set to zero. The input.extraNic == true ? 1 : 0 line checks whether the user ticked the checkbox for the extra NIC and if they did, assigns count key a value of 1 (or 0 if they didn’t)
4: dynamic vm networks⌗
Now comes the tricky part. To make sure the VM is only provisioned with two NICs when the user checks the box in the deployment wizard, we need to use the map_by function when declaring its networks configuration. What map_by does is - to put it simply - a conversion of strings to usable key:value pairs. This will allow us to dynamically pull the values from network resource definitions and leverage vRA’s default behavior of dropping resources with count set to zero to make sure the extra NIC is only there when it’s needed. Here you can learn more about map_by and other functions available in vRA 8.x Cloud Assembly.
Here’s how a line like that would look in our exact scenario:
networks: ${map_by(resource.Cloud_vSphere_Network_1[*].* + resource.Cloud_vSphere_Network_2[*].*, net => {"network":net.id, "deviceIndex":net.deviceIndex})}
As you can probably tell, you can easily modify that line for more optional NICs simply by adding another resource.Cloud_vSphere_Network_X[*].* to the equation.
5: putting it all together⌗
Here’s how a very simple blueprint would look like with a single VM configured to dynamically connect to one or two networks depending on user input:
formatVersion: 1
inputs:
  extraNic:
    type: boolean
    title: Add a secondary NIC to the VM
    default: false
resources:
  Cloud_vSphere_Network_1:
    type: Cloud.vSphere.Network
    name: default_network
    properties:
      networkType: existing
      eviceIndex: 0
  Cloud_vSphere_Network_2:
    type: Cloud.vSphere.Network
    name: extra_network_1
    properties:
      networkType: existing
      count: '${input.extraNic == true ? 1 : 0}'
      deviceIndex: 1
  Cloud_vSphere_Machine_1:
    type: Cloud.vSphere.Machine
    properties:
      image: vm_template
      cpuCount: 1
      totalMemoryMB: 1024
      storage:
        constraints:
          - tag: storage:gold_tier
        bootDiskCapacityInGB: 4
      networks: ${map_by(resource.Cloud_vSphere_Network_1[*].* + resource.Cloud_vSphere_Network_2[*].*, net => {"network":net.id, "deviceIndex":net.deviceIndex})}
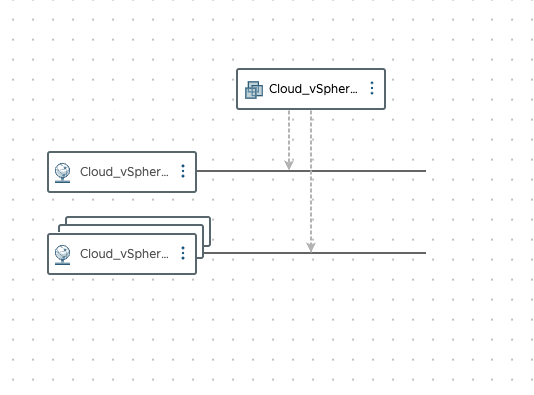
And here’s how it would look like on the canvas and from the user point of view: