How to: NSX SSL VPN Plus
Setting up VPN made simple through VMware NSX! If you ever had to deal with setting up a proper VPN environment using regular tools (OpenVPN Server, Fortigate, SonicWALL etc.), you are going to love it how simple it is (yet secure!) to manage your virtual private network(s) using the networking powerhouse (swiss-knife?) VMware NSX.
1. What is VMware NSX SSL VPN-Plus?⌗
VMware NSX SSL VPN-Plus enables individual remote users to connect securely to private networks behind an NSX Edge gateway. The SSL encrypted tunnel is established between the client (user) and the server (NSX Edge). It is also possible to use the SSL VPN-Plus to setup a site-to-site (server-to-server) SSL VPN tunnel, but we won’t be going through that process in this post.
SSL VPN Plus have two modes available: web & full network access:
- Web Access Mode – enables the user to connect to the network without a hardware or software SSL client
- Full Network Access Mode – requires the user to have a SSL client installed on their machine

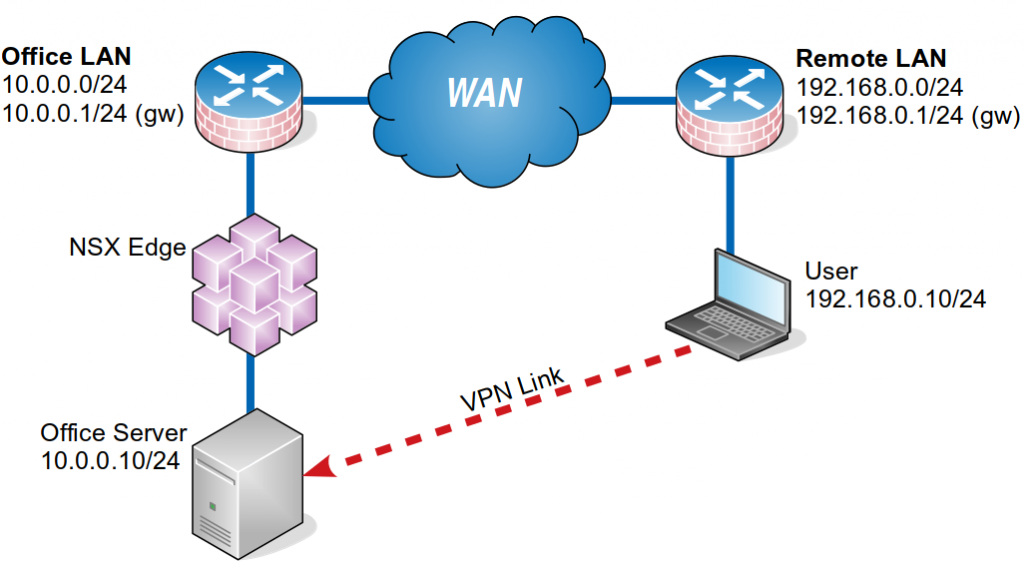
In this tutorial, we’re going to configure a VPN for the users – connecting through a “Remote LAN” – which is going to grant them an access to the “Office Server”:
2. Configuring SSL VPN-Plus Server⌗
Firstly, we need to log into the NSX Edge ESG and open the SSL VPN-Plus server settings page. To do so, navigate to Manage tab, open up SSL VPN-Plus sub-tab, select Server Settings and finally click Change:

In there, you can check the current IPv4/6 listener, port, certificates and cipher (change it to AES256-SHA if it’s not it already!). Note down all of these, as we’re going to need them for the next steps.
3. Create an IP Pool⌗
As with all other VPN solutions, NSX SSL VPN-Plus, requires as IP pool for the private network which it is going to manage. This pool will be released to the VPN clients once they succesfully authenticate and establish a connection to the network. This works just like a regular DHCP and can be skipped partially if you’d like your clients to use static addresses instead of random DHCP leases.
The network to which these IP address belong, should be different from any existing subnet in your NSX environment and should not be configured on any other devices on the physical or virtual networks with the exception of routes that point to it. Similarly to the other VPN solutions, you can (but don’t have to) configure routing between the already existing virtual/physical networks in your environment and the VPN network. If you don’t configure routing between the networks, the clients won’t be able to access anything on the VPN server site unless explicitly allowed through static routes. Not creating any routing between your networks can be useful if the VPN is only supposed to be a “security layer” for the remote users.
To configure the IP pool, open up the “IP Pool” sub-section of the “SSL VPN-Plus” settings page. Click the green plus icon to create a new pool. Fill in all the settings according to your environment:
IP Range– the range of IP addresses to be shared between the VPN clients; in my example this is going to be:172.18.0.100-172.18.0.199Netmask– the network mask to be pushed out to the VPN clients; in my example this is going to be:255.255.255.0(or/24if you wish)Gateway– this should be same as the gateway configured on your system; in my example this is going to be:10.0.0.1Status–enabled(obviously…)Primary/Secondary DNS– not required; if you want the VPN clients to use a DNS resolver, put its IP address in here; in my example this is going to be:10.0.0.51and10.0.0.52DNS Suffix– aka “Search Domain” for the Linuxheads; this setting specifies the default domain for the VPN users; in my example this is going to be:wilks.labWINS Server– nobody uses WINS anymore… get out of here
4. Sharing out Private Networks⌗
In this section, you can configure the routes which are going to be pushed out to the VPN clients. This essentially removed the need to configure all the necessary routes on your routers/gateways as the clients “will know” on their own where to go. Obviously, even after configuring these routes, you’d still need to configure reverse routes on the gateways if you’d like your servers/”office LAN” hosts to be able to initiate communication with VPN users.
The “Private Networks” section can be found in the “SSL VPN-Plus” sub-tab. Click the green plus icon to add a private network to the configuration.
Network– the IP address of the network you’d like the VPN users to have access to; in my example this is going to be:10.0.0.0/24
You can leave all the other settings with the default values for basic access configuration. I might come back to this in a latter post to explain the other details/options further.
5. Configure Authentication⌗
In this tutorial, we’re going to base our authentication on Active Directory, as this is the authentication system which I have in my lab at the time of the writing. Configuring the VPN using other authentication providers is pretty similar. Just for the reference: my AD OU (organization unit) is SWZLAB, while the domain name is wilks.lab
To configure authentication, open up the “Authentication” part of the “SSL VPN-Plus” section in the “Manage” tab. As you can see, we need to fill in quite usual LDAP details in here:
IP Address– the address of the domain controller; in my example:10.0.0.50Port–389(default; adjust according to your AD setup)Timeout–10(default; no need to change this really)Search Base– this is basically the distinguished name (or OU DN); in my example this is going to be: OU=SWZLAB,DC=wilks,DC=labBind DN– this field is for the username of domain user which NSX is going to use to log into the AD (should have DC admin privileges); in my example this is going to be: CN=admin,OU=SWZLAB,DC=wilks,DC=labBind password– password for the user mentioned above (wilks.lab**admin**)Login Attribute Name–sAMAccountName; this forces the system to use the legacy account names from AD (reverse compatibility requirement)Search Filter– these filters can be used to restrict the numbers of users or groups that are permitted to access the VPN; setting this toobjectClass=*will allow everyone to connect
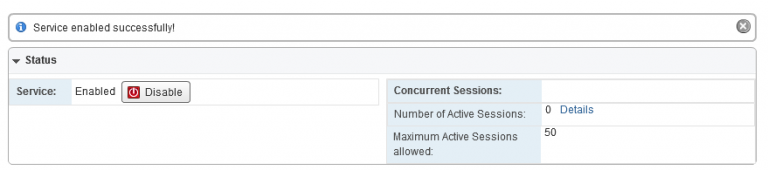
6. Enabling the SSL VPN-Plus⌗
Having all that done, we can finally enable the SSL VPN-Plus service from the Dashboard. Yay!
7. Client configuration⌗
To configure some basic properties of the installation package for the Full Network Access Mode users, navigate to the “Installation Package” sub-section. Click the green plus icon to configure your client package.
Profile Name– this will be the name of the package visible on the web portal; choose something explaining what it does (if you plan to implement multiple packages for multiple sub-sites etc.)OS Selection– choose the operating systems for which the package should be prepared (Windows/OS X/Linux)Windows Parameters– pretty self-explanatory; here you can choose additional settings which are going to be applied to Windows clients (silent install mode, no icon in system tray etc.)
Before moving on, remember to click the green plus icon on the package configuration pop-up and then add a gateway and port – this configures where the installation package will be available for download (in other words: your public IP and a HTTPS (443) port).
8. Accessing the VPN⌗
From this point onwards (provided you open up the port 443 & others on the gateway, forward them to the and so on and so on…), the remote users should be able to access the NSX SSL VPN-Plus portal by navigating to the public IP address/hostname of your infrastructure.
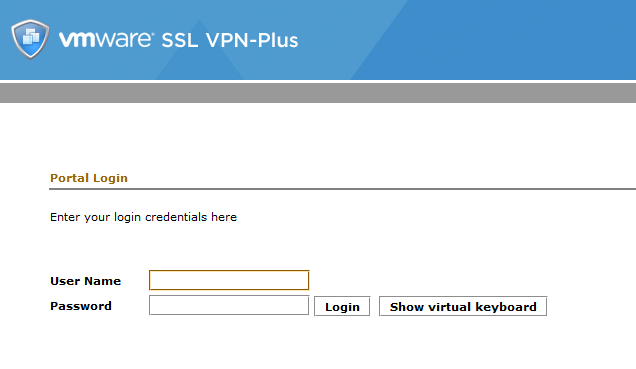
After successfully logging in, a download link to the Full Access Mode client should be available under Full Access/Full Access/List