File Server Migration
With VMware vSphere you can migrate a vmdk virtual disk to a different VM retaining Windows NTFS permissions in a very easy way. This allows you to quickly migrate the data from in an event of File Server redesign or emergency failover (i.e. during a cyber attack etc.)
If the current server belong to an AD domain, the migration of the stored data to a new server raises the problem of the applied NTFS permissions. How to retain all the settings?

Before proceeding, ensure you have a backup of all the data or the whole VM you will be migrating the data off.
Firstly, log into the VM guest OS (be it Windows Server 2012, 2008 or 2016 – it’s the same procedure on all) and open up disk management wizard and put the disk in question offline:
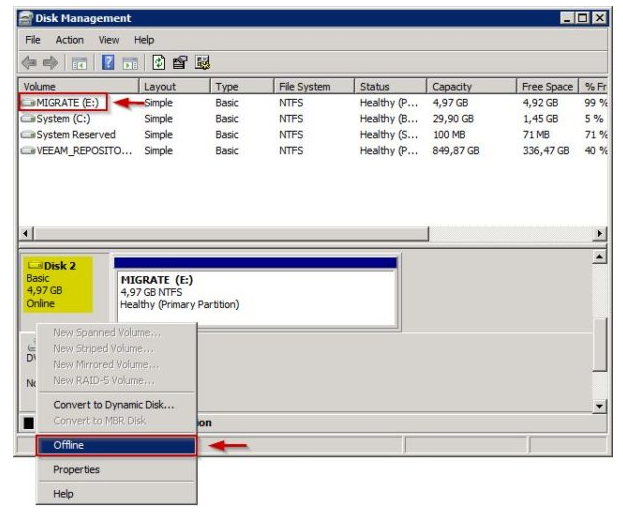
After the disk goes offline, Windows OS won’t be able to access the files on it. This process is similar to unmounting a disk on Linux/*nix.
Having that done, we need to go to vSphere/ESXi console and remove the disk from the VM, which can be done using the “Edit Virtual Machine” wizard:

Remember to leave the “Delete files from datastore” option unchecked!
If you prefer to leave the disk still connected to the old server, you can also leave the disk attached and copy the VMDK file to a new location. This will create an exact replica of the disk we’re migrating with all the NTFS permissions in place. To do that, open up the storage tab, browse the files on the volume containing the VMDK, right click on it and select the “Copy to” option.
Now comes the part where we attach the old/new disk to the new server. Open up the VM properties and select “Existing virtual disk” in the hardware tab:
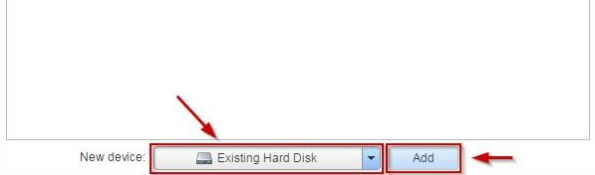
After clicking “Add” button, browse to the location where the disk is located and select it. Save the configuration wizard and exit the VM properties dialog.
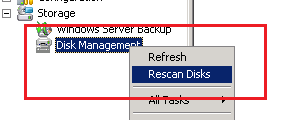
Now comes the last step; connect to the new file server and open up the disk management utility. Once you’re inside, select the option to scan for the new disks – the disk you’ve just attached should appear in a minute:
After the scan process finishes, you should be able to see the new disk. It is now offline, so we need to bring it up before Windows recognizes it:
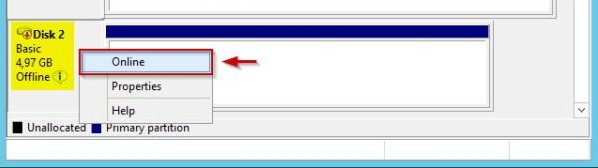
You can do the same now on the old server if you’ve copied the disk instead of migrating it.
Aaaand that’s it. Checking the NTFS permissions from the new Windows Server, all the NTFS permissions have been retained. Only the shares need to be recreated since the server name has changed. All stored data are available to users again in a transparent way. The administrators only need to configure the new disk map in AD to point to the shares of the new server.