Reset ESXi root password
Admit it. This can happen to all of us. Somebody was changing the root password while intoxicated, without a notepad at hand or had a sudden memory loss.
Whatever’s the reason, you’re now locked out of your own host. What now?
1. The Scenario⌗
You’ve lost your ESXi root password. Simple as that. You might not like it, but that’s the world we’re living in. It’s your fault, you know it, the world will never be the same unless you quickly open up your browser and look for a solution. Take a deep breath, because that’s gonna be tricky (…as tying your shoes).
2. The Solution⌗
Before we begin there are two things you need to check before proceeding. For this method to work:
- The ESXi host must be reachable via the network and managed through a vCenter Server (of any kind).
- ESXi host must be configured with vSphere Enterprise Plus license (you can assign this license for the password reset operation and remove it afterwards). In critical situations, when there wouldn’t be enough time to get it, you can substitute Enterprise Plus license with the 60-day trial license for which you can apply on VMware website.
After making sure your environment supports the requirements above, you can proceed to the next steps.
In this method, we are going to use host profiles, which is nothing but a template of configuration settings that you can apply to an ESXi host.
Because of the above, this guide will be split into two basic parts – creating a host profile and applying it to ESXi host.
Creating “Password Reset” Host Profile:
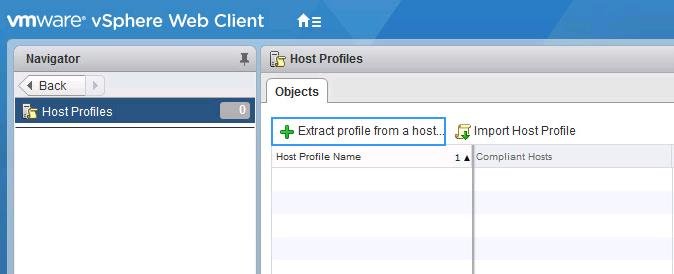
- Login to vCenter Server using vSphere Web Client
- Click on Host Profile icon on the home page and select “Extract profile from a host”
- On the following page, select a host for which you know the root password
- On the last page, type in the name for the host profile (I suggest something self-explanatory such as
ESXi Root Password); - Right click on the new Host Profile and select
Edit Settings;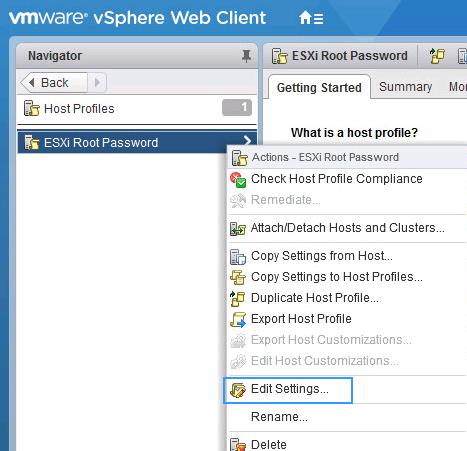
- In the pop-up dialog, navigate to
//Security and Services/Security Settings/Security/User Configuration/root - Select
Fixed password configurationunderPassword - Make sure to deselect all other configuration and click “Finish”.
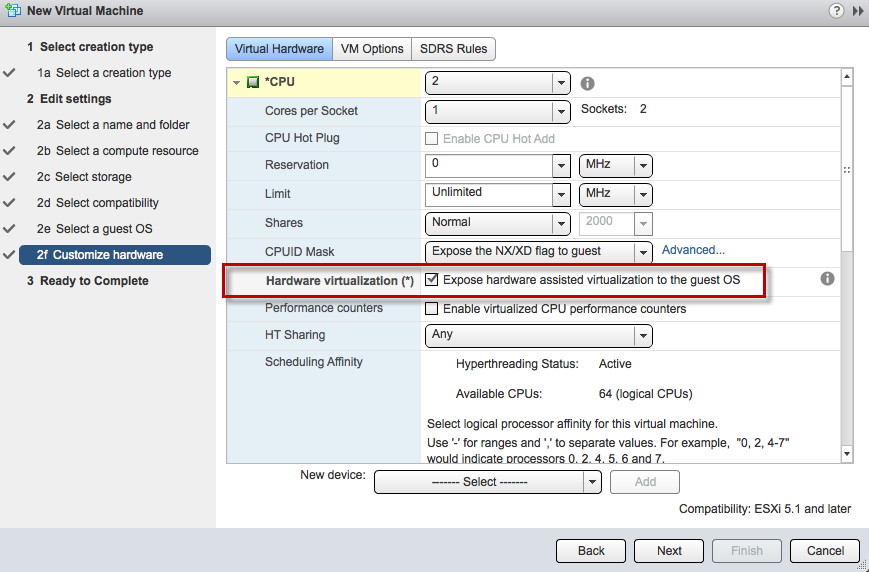
If you don’t have any other ESXi host in your environment (e.g. in a lab), you can quickly deploy a new one without getting new hardware by creating a VM and installing ESXi on it. Remember to select the following option to enable nested virtualization:
Applying “Password Reset” Host Profile to ESXi:
- Select the Attach/Detach Host icon on the Action menu
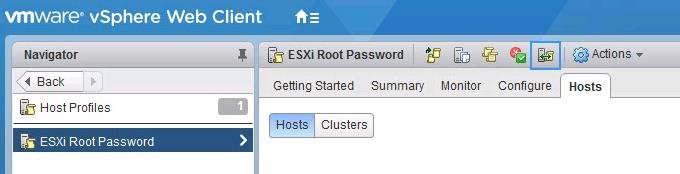
- Select the ESXi host for which you do not know the password and click “Attach”
- Confirm the change by selecting “Finish”
- The last thing left to do is to force the password reset. At the moment no changes were applied to the host yet as vCenter detected that the current (lost) password does not match the new (known) password from our Host Profile 5. Go to “Monitor” tab on the new Host Profile we created earlier
- Select “Compliance” sub-tab
- Select the “Tools” icon on the left
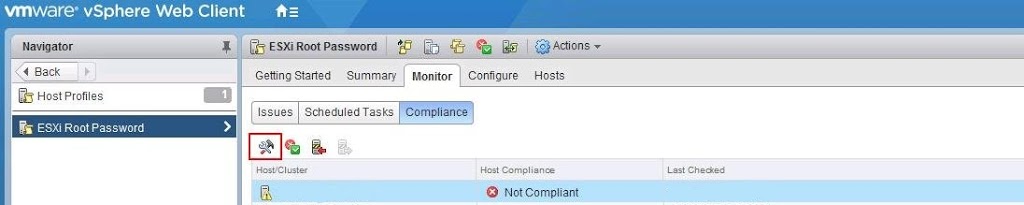
- Click “Finish” in the new window. This will launch the remediation of the ESXi host based on the attached Host Profile, ergo resetting its root password
- Done; you can now login to your ESXi host using the known password
3. The Conclusion⌗
As you can see the process is pretty straight forward. The only real way to screw this process up is:
a) leaving other configuration options enabled in the extracted Host Profile
b) forgetting to launch the remediation after attaching the Host Profile
Other than that it is pretty much impossible to destroy your environment with this method. It might seem a bit convoluted for a such simple task, but trust me – it is the simplest way to do that without exposing your environment to any possible “dangers” 😉
I hope you found this guide informative and useful to you. See ya next time.